Hello fellow yarn enthusiasts! Get ready to dive into a world of oceanic charm with our collection of Cute Sea Turtle Crochet Patterns That Are Simple To Make. If you’ve been dreaming of crafting adorable, huggable sea creatures, you’ve come to the right place!
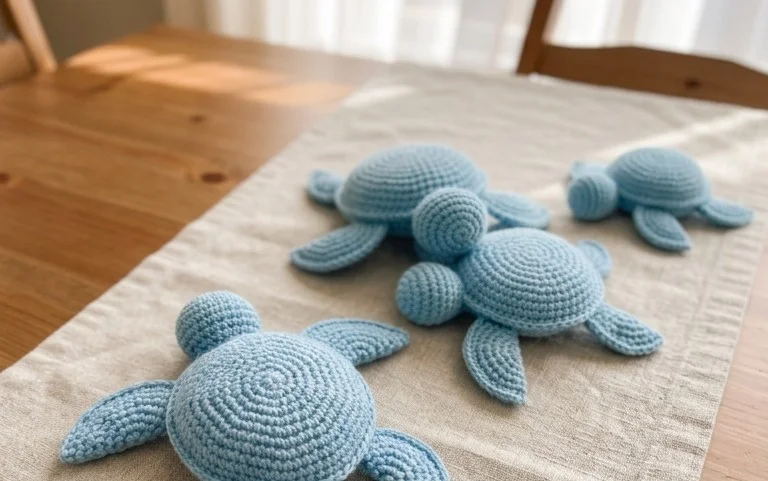
Imagine stitching up these delightful little turtles, their sweet faces peeking out, ready for an adventure. Their rounded shells and gentle expressions make them an absolute joy to behold. These patterns are perfect for anyone dipping their toes into crochet, or for experienced crafters looking for a quick and satisfying project. They make the most charming gifts for loved ones, delightful additions to nursery decor, or even as cute little desk buddies!
Inside, you’ll discover step-by-step instructions that are easy to follow, along with tips and tricks to ensure your sea turtle turns out perfectly. Let’s grab our hooks and yarn, and create some shell-ebrations!
## Dive into Delightful DIY: Cute Sea Turtle Crochet Patterns That Are Simple to Make!
There’s something undeniably charming about sea turtles. Their gentle nature, ancient wisdom, and graceful glide through the ocean depths have captured our imaginations for centuries. Now, you can bring a touch of that oceanic magic into your home or gift a handmade treasure with these delightful and surprisingly simple crochet sea turtle patterns! Whether you’re a seasoned crocheter looking for a quick and satisfying project, or a curious beginner eager to dip your toes into the world of amigurumi, these patterns are designed to be approachable and rewarding. Get ready to create your own adorable aquatic friends!
### What You’ll Need: Your Turtle-Crafting Toolkit
Before we dive into the magic of crocheting, let’s gather our supplies. The beauty of these sea turtle patterns is their versatility; you can adapt them to many yarn types and hook sizes. However, for a beginner-friendly experience and a wonderfully cuddly result, here are some recommendations:
Yarn Recommendations:
The most popular choice for amigurumi, including these sea turtles, is **worsted weight (category 4) yarn**. This weight strikes a great balance: it works up relatively quickly, creates a nice density for stuffed toys, and is readily available in a rainbow of colors.
* **Cotton or Cotton Blends:** These are excellent choices for amigurumi as they offer good stitch definition, are durable, and have a lovely matte finish. Look for 100% cotton or blends with acrylic for a touch of softness and stretch.
* **Acrylic Yarn:** A more budget-friendly option that’s also very forgiving for beginners. Choose a good quality acrylic that isn’t too splitty, as this can be frustrating when learning new stitches.
* **Color Choices:** The classic sea turtle colors are, of course, shades of green and brown for the shell and flippers, and a lighter green, cream, or even a soft blue for the body. But don’t be afraid to get creative! Think sunshine yellow, ocean blue, or even a rainbow shell!
Hook Recommendations:
The hook size you choose will directly impact the finished size and density of your turtle. Generally, for worsted weight yarn and amigurumi, you’ll want to go down a size or two from what’s recommended on the yarn label. This helps create tight stitches that prevent the stuffing from showing through.
* **Recommended Hook Size:** A **3.5mm (E/4) or 4.0mm (G/6)** crochet hook is a fantastic starting point for worsted weight yarn.
* **Experimentation:** Don’t be afraid to try a slightly smaller hook if you find your stitches are too loose, or a slightly larger one if you want a more open texture.
### Mastering the Magic: Key Crochet Techniques You’ll Use
These cute sea turtle patterns are designed to be accessible, so you won’t be encountering overly complex stitches. You’ll likely be working with a few core techniques that are fundamental to amigurumi:
Essential Stitches:
* **Magic Ring (or Magic Circle):** This is your best friend for creating a tight, seamless start to round amigurumi pieces like the head, body, and shell. It allows you to create a closed circle with no hole in the center, which is crucial for stuffed toys.
* **Single Crochet (sc):** This is the workhorse of amigurumi! It creates a dense fabric that’s perfect for stuffing. You’ll be using this stitch for almost every part of your turtle.
* **Increase (inc):** This technique involves making two single crochet stitches into the same stitch in the previous round. It’s how you’ll shape your turtle, making it gradually wider.
* **Decrease (dec):** The opposite of an increase, a decrease (usually worked as a “invisible decrease” for a neater finish) involves crocheting two stitches together. This is how you’ll shape your turtle to become narrower again.
* **Slip Stitch (sl st):** Used to join rounds and finish off pieces.
* **Chain (ch):** Used to create a foundation row for flat pieces (like flippers) or to add height between rows.
Helpful Techniques (Optional but Recommended):
* **Invisible Decrease:** This technique creates a much neater and less noticeable decrease than a standard decrease. It involves working your single crochet around the front loops of the next two stitches.
* **Yarn Under vs. Yarn Over:** While most patterns assume “yarn over,” some crocheters prefer “yarn under” for amigurumi as it can create a slightly tighter fabric. Whichever you choose, be consistent!
### Beginner’s Best Friend: Tips for a Smooth Turtle Journey
Embarking on your first amigurumi project can feel a little daunting, but these tips will help you navigate the process with confidence and create a charming turtle from the start!
* **Read Through the Pattern First:** Before you even pick up your hook, read the entire pattern from beginning to end. This will give you an overview of the steps involved and help you anticipate any potentially tricky parts.
* **Use a Stitch Marker:** This is an absolute must for amigurumi! Since you’ll be working in continuous rounds, it can be easy to lose track of where a round begins and ends. Place a stitch marker in the first stitch of each round to keep yourself on track.
* **Stuff as You Go:** Don’t wait until the very end to stuff your turtle! As you crochet each piece, gradually add stuffing. This will allow you to shape the piece evenly and avoid lumps. Start stuffing when the piece is about two-thirds of the way completed.
* **Stuff Firmly but Not Too Tightly:** You want your turtle to be plump and huggable, but avoid overstuffing, which can stretch your stitches and make them too noticeable. Aim for a firm, rounded shape.
* **Weave in Your Ends Securely:** After you’ve finished and sewn your pieces together, make sure to weave in all your yarn ends securely. This prevents your stuffing from escaping and ensures your turtle stays intact.
* **Don’t Be Afraid to Make Mistakes:** Everyone makes mistakes when crocheting! The beauty of crochet is that you can often simply “frog” (pull out) your stitches and try again. Don’t get discouraged if you need to undo a few rows.
* **Practice the Magic Ring and Single Crochet:** Before you start your turtle, spend a few minutes practicing the magic ring and single crochet stitch. The more comfortable you are with these, the easier the rest of the project will be.
### Your Turtle, Your Way: Unleash Your Creativity with Customization
These sea turtle patterns are fantastic foundations, but the real fun comes with personalizing your creations!
Color Combinations Galore:
* **Classic Combinations:** Stick with earthy greens and browns for a traditional look.
* **Oceanic Hues:** Experiment with different shades of blue for the body and shell, perhaps with a contrasting yellow or orange beak.
* **Rainbow Reef:** Create a vibrant turtle with a shell made of different colored stripes or a mosaic of colors.
* **Fruity Fun:** Think of a turtle with a pink shell and green body, reminiscent of watermelon!
* **Monochromatic Magic:** A simple, elegant turtle in a single shade of green or blue can also be stunning.
Size Matters (and it’s Easy to Change!):
The easiest way to adjust the size of your crocheted sea turtle is by **changing your yarn weight and hook size**.
* **Larger Turtles:** Use a bulkier weight yarn (like bulky or super bulky) and a larger hook.
* **Smaller Turtles:** Opt for a lighter weight yarn (like sport or DK) and a smaller hook.
* **Slight Adjustments:** You can also make subtle size adjustments by adding or subtracting a few stitches in the increase/decrease sections of the pattern, but be careful as this can alter the proportions.
### Keeping Your Little Friend Shipshape: Care Instructions
Your crocheted sea turtle is more than just a toy; it’s a handmade treasure! With a little care, it will bring joy for years to come.
* **Hand Wash Recommended:** For best results and to maintain the shape and integrity of your turtle, hand washing is highly recommended.
* **Gentle Soap:** Use a mild detergent or soap specifically designed for delicates.
* **Lukewarm Water:** Wash in cool to lukewarm water. Avoid hot water, as it can cause yarn to felt or colors to bleed.
* **Rinse Thoroughly:** Gently rinse out all soap residue.
* **Reshape and Air Dry:** Gently squeeze out excess water (do not wring!). Reshape the turtle to its original form and lay it flat on a clean towel to air dry. Avoid hanging it, as this can stretch it out of shape.
* **Spot Cleaning:** For minor spills or marks, you can often spot clean with a damp cloth and a tiny bit of mild soap.
### Beyond the Basics: Adorable Project Ideas
Once you’ve mastered the basic sea turtle, the possibilities for using your new skills are endless!
* **Cuddle Companions:** Create a whole family of turtles in various sizes and colors for a delightful nursery decoration or a child’s new best friend.
* **Ocean-Themed Garland:** Make several small turtles and string them together with colorful yarn or beads to create a charming garland for a beach-themed party or room.
* **Keychains and Bag Charms:** Use a smaller hook and thinner yarn to create miniature turtles that can be attached to zippers, backpacks, or keys.
* **Stuffed Toys for Charity:** Amigurumi are always a welcome donation to children’s hospitals or shelters.
* **Unique Gifts:** A handmade sea turtle is a thoughtful and personalized gift for anyone who loves the ocean or cute, crafty things.
* **Part of a Larger Scene:** Imagine your turtle swimming amongst crocheted coral reefs, seaweed, and other sea creatures!
So, gather your yarn, grab your hook, and get ready to embark on a creative adventure. These simple sea turtle crochet patterns are an invitation to slow down, get crafty, and bring a little bit of the ocean’s serenity and charm into your world, one stitch at a time! Happy crocheting!
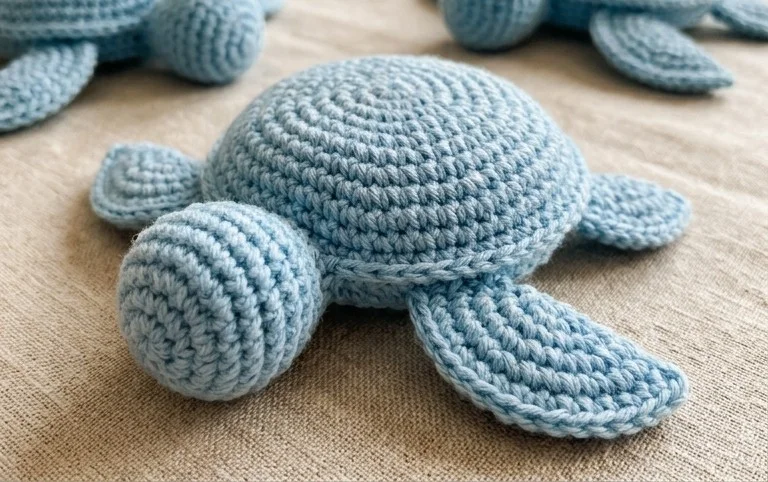
There you have it – a collection of adorable and incredibly simple sea turtle crochet patterns! We hope these little guys have inspired you to grab your hook and yarn and get creating. They’re perfect for beginners and seasoned crocheters alike, offering a delightful way to bring a touch of the ocean into your home.
Don’t be shy about showing off your beautiful finished turtles! We’d absolutely love to see them. Tag us on social media with #CuteTurtleCrochet so we can share in your success. Feel free to experiment with different yarn colors, add unique embellishments, or even create a whole family of sea turtle friends. And when you’re ready for your next crochet adventure, be sure to explore more of our delightful patterns!